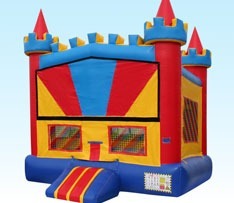
What’s the proper way to setup a bounce house?
At Bounce It Out Events, we offer customer pickups on our bounce houses and thought there’s no better way to inform our customers on proper setup, than a step by step tutorial.
The first and most important step of the process is to have a high quality inflatable. Without this integral step of the process, everything else is to waste. That’s why we purchase inflatables from reputable manufacturers like EZ Inflatables. EZ Inflatables produces a high quality inflatable that meets all ASTM standards and most importantly is manufactured right here in the USA.
After selecting the perfect inflatable of your choice from our selection, you can setup your pick-up appointment at our warehouse with one of our trained staff members. They will check you in, load your inflatable for you, give you an instruction sheet and point you to the video contained in this post.
Once you get the bouncer home, it’s time to set it up properly and safely! Make sure the area you choose to setup on is as flat as possible, free of debris, sharp rocks or animal droppings and the grass has recently been cut. Check above the area you plan to setup to make sure there are no low lying tree limbs or overhead power lines.
You’ll begin first with the tarp. We include a 15×15 tarp with all of our inflatable rentals. Along with the tarp we include 4 tarp stakes to secure the tarp to the ground. Make sure the tarp is in an area in front of the inflatable as the tarp is used to keep the inside of the inflatable clean and free of debris. The tarp also makes an excellent mat for children to remove their shoes and keep their socks clean while playing inside the bounce house.
Once you have the tarp in place, we’ll place the bounce house next to the tarp. We want to make sure that the roll is in the direction that we want the door to face. Once we drop the moonwalk next to the tarp and have it positioned properly, we untie and unroll the inflatable. Once it is unrolled, we unfold the bounce house to make it a perfect square.
Once we have the inflatable unrolled and opened completely, we can close the zipper on the back of the bouncer and attach the blower. The blower goes into the tube and the tie strap should be pulled as tight as possible. You will want to ensure that the tie strap is fully behind the lip on the blower snout when tightening. If you do not get the strap tight enough or properly behind the snout you risk the event of blowing the tube off the blower.
After attaching the blower, we need to supply power to the blower to make everything come to life! We supply every rental with 100ft of power cord. You’ll want to plug into an outlet within 100ft and make sure that the cord does not become a trip hazard. You need to also make sure to never run the cord under the tarp or the bounce house. Always plug the cord directly into an outlet and never into a splitter or surge protector. Commercial blowers pull enough amperage to melt the cords if not plug directly into an outlet.
Once we have the inflatable properly layed out, the blower attached and the cord plugged in, it’s time to switch the blower on. It will only take a couple of minutes for the bounce house to inflate completely.
Once the bounce house completely inflates, we need to secure the inflatable to make sure we don’t end up on the evening news! For every bounce house rental, we provide 4 stakes to secure the inflatable to the ground. Every inflatable has 4 tie-down straps, so we will be driving each of the 4 stakes into each corner of the bounce house. We want to make sure we center the moonwalk on the tarp and pull the straps as tight as possible before driving each stake flush to the ground.
Once you have completed everything above, you have successfully installed your first bounce house! Have fun and enjoy with the safety rules sheet included in your pick-up information! Don’t forget to watch our video below that gives you step by step instruction on how to properly setup your bounce house rental.

